Saturday 8 August 2015

An Update...

I have to admit that the Think Like A Blogger Challenge hasn't quite worked out. It was quite a lot for me to take on during such a busy week. The first few days were fine because I had plenty of spare time and inspiration. However, as the week went on I just didn't have the time to be writing a blog post and taking/editing the pictures every single day. One thing I have learnt from my short time of daily blogging is that you really can blog about anything! As I am just starting out maybe the challenge wasn't the best idea for me and my blog but I gave it a try and that's all that matters. The timing just wasn't right. So recently I have been very busy as I took a trip to London! It was a really exciting experience and I can't wait to share it with you in my next post, coming up very soon.
The Think Like A Blogger Challenge has really helped and inspired me to take this more seriously, however as a rule, I'd say daily blogging isn't right for me just yet. My new schedule will include a blog post every Saturday and maybe a few surprises in the middle of the week if I'm feeling really inspired!

I have some ideas written down for blog posts that will be coming very soon, remember to look out for my London blog post in the next couple of weeks.

Check out my Instagram to see what I've been up to lately!

Hope you have an awesome day!
Don't be a stranger  Twitter // Instagram // Bloglovin'

JAZ BISHOP x

Friday 31 July 2015

Think Like A Blogger Challenge // River Flows in You

As a personal challenge I have decided to learn River Flows in You by Yiruma. I took my ABRSM grade 5 exam this summer and I was SO nervous. I desperately wanted to pass and after I'd already had the stress of 21 other GCSE exams I think the timing was really bad for me. Fortunately, I passed! (yay) For a little while after I think I was a little scared to get back on the piano as I'd been so nervous for my exam and during the waiting period, before I found out, I had convinced myself that I had failed. After that I really didn't want to make any mistakes whilst playing, so I avoided it. Then I realised. Everybody makes mistakes and why does it matter any way, I'm not performing, I'm practicing. I decided not to continue playing my grade 5 pieces as I didn't need to and also it would be quite annoying if I ended up playing it better than I had in my exam, which was almost inevitable.
I needed to take a moment to just stop and be proud of myself for passing my exam. After that it was so easy to rediscover my love for piano. I'd always wanted to learn River Flows in You as it is such a beautiful song but I'd always pictured it as really difficult. Now that I am a grade 5 pianist I feel that it is much more comfortable for me to learn - although I must admit my sight reading isn't the best!
I think it's really good to set personal challenges and this is one of mine for the summer, I can''t wait until I can play it fluently!


Tuesday 28 July 2015

Think Like A Blogger Challenge // Fresh Air

Is it just me or do you find spending all day inside totally rubbish? For the past two days that's all I've done. Not going outside actually makes me feel physically sick. I think living where I do, it's quite an outdoorsy sort of place, so not leaving the house is kind of a shock to the system for me.
As part of the Think Like a Blogger Challenge, today's post is about good old fresh air. My go to place when I need to get out the house is the beach. There's something so peaceful and calm about it and it's good 25 minute walk for me. When I'm feeling like this, I find anything helps - just walking and listening to my headphones gives me that automatic happy feeling. There's something you can't really describe about a good walk. (Does anyone else sometimes get so lost in their music and it feels like you're in a movie scene or something as you walk down the street:')?)
For today's post enjoy the calm aura of the beach with me and check out some of my recent favourite songs. It's kind of like a go-to walking playlist. 

Against The Current - Ain't It Fun // (Cover of Paramore)


The 1975 - Chocolate


Kings Of Leon - Radioactive


Nirvana - Smells Like Teen Spirit


In case you're wondering... Yes it is summer, but British summer time likes to disappoint and it's very risky to leave the house without my trusty leather jacket nowadays! A good old sea breeze to blow the cobwebs off, that's what I keep telling myself!

What songs have you been loving recently? Where's your 'calm' place? Comment down below!
Don't be a stranger   Twitter // Instagram // Bloglovin'
Have an awesome day!

JAZ BISHOP x

Monday 27 July 2015

Bold Lips & Think Like A Blogger Challenge

So recently, as I scrolled through my reading list, a post by Lily Melrose caught my eye. The 'Think Like a Blogger Challenge'. You can read it here but the general gist is that you just need to use inspiration by looking at the things around you! You don't need to over complicate blogging and that you shouldn't feel like you have to rush out and buy the 'latest' thing, you should just be able to pick out something you've had a long time or that you use every day. This is great timing for me because I've been trying to think of blog posts as my blog is finally up and running. So, inspired by the amazing Lily I will be blogging daily for this week only, following up the 'Think Like a Blogger Challenge' and I challenge you to try it too!


Topshop Lips in Black Widow
(no longer available but similar here and here)
Top - Topshop
Recently I went shopping and as I was getting ready to leave the house I discovered a lipstick that I actually got for Christmas last year and I've never had the confidence to wear. I felt like it was actually too dark for me and it was too bold(Now I think is there such a thing? Be as bold as you like). Reluctantly, I slapped it on with the rest of my makeup and I suddenly felt really good about myself. I was surprised how good my lips looked for such a daring colour that was completely out of my comfort zone. Say what you like but there's something about a lipstick that just makes you feel good. I personally am not really one for all these bright/hot pinks as it's not really me, but this deep dark purple was perfect. I wore it with a really simple outfit and I actually felt great all day and it's staying power was pretty damn good. I know you may think purple is more of a winter shade but why not break the boundaries and wear it all year around? I know I'll be using this a lot more this season and in the following ones - I mean why can't you have an all-year-round lipstick?
They may say blondes have more fun, but they're wrong - bold lips have more fun! Give it a try, I dare you.

Let me know what your bold lipstick shade is, comment down below!
Don't be a stranger Twitter // Instagram // Bloglovin'
Have an awesome day and stay tuned for tomorrow's post!
JAZ BISHOP x

Saturday 25 July 2015

How to Create a Header for Your Blog

Have you just started out but want a personal and professional look for your blog? Look no further…
   So as we may all know when we first start a blog (I’m new to this too!) we want something unique to us but don’t want to have to fork out the pounds to pay a professional, well here is a really easy way to make your own professional looking blog header for Blogger.(This may also work for other blogging platforms such as Wordpress but I personally use Blogger). I think the first thing that is really important to consider is what type of blog you want: do you want a theme? What kind of look do you want? After all, your header is technically the first thing readers/visitors will see of your blog. FIRST 
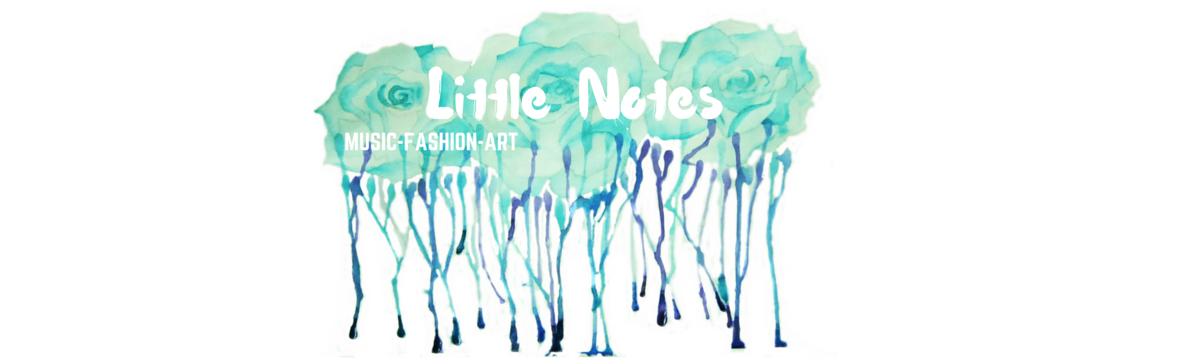
IMPRESSIONS ARE EVERYTHING. I decided I personally wanted something fairly fresh and simple but arty and slightly ‘soft-grungey’ I guess that’s what it’s called. As you might have noticed by the header (subtle I know)… this is a music, fashion and art blog so I wanted to do something quite arty but this is totally optional for you!

 Naturally I started with good old fashioned (can you really call it that if it’s for such modern technological blogging purposes… probably not.) paper and pencil. After I had sketched out some roses, you could literally choose any image you liked, I decided to fill them in with water colours. I think water colours create the pale/pastel/soft grunge feel. If you struggle with the sketching you can completely skip this step and find an image off the internet (check for copyright regulations) or take a photograph of your own or even just use the free photos and illustrations available on Canva (mentioned later, you can skip to step 5 ).

As soon as the water colours have dried the next step is to either take a photo of it (USING A GOOD LIGHT SOURCE AND QUALITY CAMERA – iPhone/phone cameras are good as long as you have the right lighting) or scan it into your computer. Unfortunately I didn’t have access to a scanner but I feel that this was just as effective.

The next step is editing (the REALLY fun bit). I always found this concept really daunting but it’s so much easier than you think and you don’t even have to go out and pay for expensive software like Photoshop which I know isn’t ideal for people just starting out. Some great alternatives? I use the Pixlr editor but there are loads of others ones out there all you need to do is search! So I open the image in Pixlr (which is actually really easy to use) and the best way to get a really clean, fresh, simple background is to really bring out the white of the background, does it sound complicated? Yeah, I thought so too. All you need is the burn tool. I set the brush size to either 200 or 100 select the range to be on ‘highlights’ and the exposure to 100. Now, this is for the outside area of the image, you don’t want to get too close to, in my case the roses, as the burn tool will start to whiten out those too.


 Once you’ve got a good cover over the majority of the background you now need to go in with the burn tool again but with different settings. You might want to play around but you want a much smaller brush size such as 30 or 50 and the brush that is slightly faded around the edges, you also want the exposure to be lower such as 70 or 80 but leave the range on highlights. This brush size will be much better for getting inbetween the lines without blurring out the details you’ve so elegantly hand drawn.

 So, what now? Well once you save the image on your computer you need to go to Canva, this is also completely free and easy to use. You have to sign up and make an account etc but you will more than likely get a lot of use out of it. So you want to select ‘use custom dimensions’ and type in the dimensions of your blog (these can be found in the ‘Design’ section of Blogger on the adjust widths tab). As an example for my header I selected: 1200 x 360 px . Once your on Canva you can easily upload your image, or use the free ones available to you, and add text etc. This is obviously just right if you are creating a header as you can easily add the name of your blog and maybe a short description. The best thing to do is just play around with it and see what looks best. Another brilliant feature of Canva is that you can duplicate what you already have by pressing the 'copy image' button to the right of your design. So you can have the same size canvas, same images, same filter and then use different text and compare them side by side!

Time to upload! All you have to do is download the file as an image from Canva and then upload it to your blog, on Blogger this is done on the Layout page. If you struggled to follow this tutorial feel free to contact me jazbishbashbosh@gmail.com with enquiries/arrangements where I could create a header for you using my own artwork/graphics.

I’d love to see how yours turned out! Leave a comment down below with your blog or tag me in a picture on Twitter or Instagram!
JAZ BISHOP x


**DISCLAIMER** I am by no means a professional, this is just how I created my blog header in a fairly simple way and I thought I would share it with you! **DISCLAIMER**

Friday 20 February 2015

Sony Professional MDR-7506 Headphones Review

THE BASICS
Price: £72, 95 (Amazon)
Suitable for: Digital pianos, Guitars, Stereo systems, TVs, laptops, iPhones, iPods, MP3 players,iPads, most phones/tablets. (Anything with 3.5mm jack or 6.35mm jack)
Cord Length: 3 metres (oxygen-free copper litz wire)
Sound Quality: (frequency response) 10Hz-20kHz (impedence) 63 Ohms
Rating: ★★★★


    These headphones were actually a Christmas present however I wanted to let them run their course a little bit before actually reviewing them. My original intentions were to use them for my digital piano (as unfortunately not everyone appreciates Mozart at 7am…) however for reviews sake and to get a real appreciation for the quality of these headphones I’ve listened to them on my iPhone and laptop including a range of music and YouTube videos. I have to say these headphones really BEAT others on the market at a fairly reasonable price, pun intended. I do own a pair of Dr. Dre Beats headphones however I have to say I was extremely disappointed to find that they actually weren’t worth the money AT ALL. Beats headphones are extremely overrated, they have a huge advertising and marketing campaign and are renowned for their ‘look’ – you can just tell when somebody is wearing a pair of Beats headphones. Although my Beats aren’t the top of the range they are still an expensive music accessory and I’m not as impressed as I hoped to be! Anyway enough about Beats because I am actually meant to be reviewing the Sony Professional MDR-7506.
  Before jumping straight in and splashing the cash I feel it is important to DO YOUR RESEARCH. This is the key in finding the perfect pair of headphones whether the Sony MDR-7506 are the headphones for you or something else is more ideal, research is key. As I had a specific use in mind I simply started with a google search: ‘best headphones for Yamaha digital pianos’. I found an extremely helpful blog post (link here) that reviewed various pairs of headphones and it was easy to see which were most suitable to your budget without over complicating things with too many specialist technology terms. Once you think you’ve found a suitable pair look for reviews online and then look at the reviews on the place you’re buying from and other suppliers to get a good range of reviews. There is a point however where the amount of reviews can get ridiculous, you can scroll for hours getting a repetitive strain injury and find that one terrible review on page 47 – we’ve all been there. Don’t let a couple of bad reviews dishearten you, obviously it is more of a problem if there is a recurring problem with the headphones you are looking to buy as this may be a design/manufacturing fault. At the end of the day reviews are generally down to what the person is comparing it to. If previously they’ve been the owner to £300 headphones that feel like duck feather pillows on your ears, that transport you to some magical place with the solid bass and the crisp soprano notes then anything less than that just won’t be satisfactory. On the other hand if the person is used to those cheap, crappy earphones you can pick up from the pound shop (that we’ve all fallen victim to when your reliable earphones seem to miraculously disappear) then they are going to feel as though they have been transported to a completely new universe trying a more expensive set of ear candy. When investing in the Sony headphones I honestly spent a ridiculous amount of time scrolling through amazon reviews and read nothing but praise! I’m not disappointed at all, I don’t feel like any of the reviews were untrue or exaggerated in the slightest.


   Sound quality. We all know we want something that sounds good but what actually is sound quality? Sound quality is (according to Wikipedia) typically an assessment of the accuracy, enjoyability or intelligibility of audio output from an electronic device. So in simple terms we want our headphones to sound as good as possible and play back to us an accurate, detailed and defined version of the song we wish to listen to. So when we listen we want to be able to pick out the drum beat, bass line, guitar riff, synths etc etc. Even to an untrained musical ear we want to hear the definite sound of each instrument so that we hear what the composer heard when they played back their song in the studio. Obviously a variety of genres will benefit differently from this feature. I have to say I think the sound quality of the Sony MDR-7506 is of really high quality for the price and has a really professional finish. The Sony MDR-7506 are a closed back pair of headphones. This means they are good at blocking out sound from your environment and transfer less sound to the people around you – the sound is more enclosed to just you – this is useful if you don’t want to be that really annoying person that blasts their music on the back of the bus for everyone to hear. This will really help you stay focused on your music and allow you to feel relaxed and you won’t be distracted or disturbed. When buying your headphones, especially if you are looking for a pair for your digital piano you may really want to consider whether open back or closed back are best for you. Something you’ll need to take into account is ‘soundstage’ which has to do with how close/far the music feels from you. You tend to get better soundstage on an open back pair of headphones but you can read more about that on the previously linked blog post above. Another thing you may see when looking to buy headphones is ‘frequency response’. This is referring to how the headphones pick up the different frequencies from bass notes to a higher register. The lower the starting number the more bass notes the headphones will pick up and obviously the higher the last number the more treble sound is picked up. Another thing linked to sound quality is ‘Impedance’ which is measured in Ohms. The higher the impedance usually the better the sound quality and the less chance there is of that annoying hiss/buzzing sound in the background; the Sony Pro MDR-7506 are 63 Ohms.
   These headphones come with a 3.5mm to 6.35mm jack adapter that screws on to end. This is
obviously very useful because you aren't limited to just using your headphones for your digital piano, amplifier/guitar or stereo because they have the classic 3.5mm jack that most phones, iPods, MP3s, iPhones, Macs, iPads and laptops have. This means great sound quality on all your devices – one size does fit all! The fact the jack screws onto the end could be seen as a negative or a positive. The negative side is if you lose it or break it, it’s probably going to be difficult to find a replacement that will fit exactly so your headphones will be limited to only 3.5mm devices. However the jack is probably better and is designed specifically for the headphones meaning the overall product quality is higher than the ones you find on eBay/Amazon for about £3 that only have good quality sound spanning 2 octaves from C to C. For the better quality this will hopefully be a more sturdy addition to the headphones unlike some cheap ones I have seen on amazon which have actually split into two pieces!
    It’s not all about the actual performance of the headphones, if they aren’t actually comfortable to wear it doesn't matter how good the sound quality is. This was one of my main reasons for investing in this new pair. My last pair of headphones that I used for my digital piano alone were SO uncomfortable to wear – they would give me headaches after wearing them for long periods of time! My Beats which I used for listening to music on my iPhone were also quite uncomfortable. They weren't the right size for my head and couldn't be made any smaller, they would move around and slip down all the time and just weren't right when you were trying to listen to music. My new Sony headphones though are the complete opposite the closed back and plenty of padding as well as leather padded overhead part are really comfortable. They are perfect for listening to for prolonged periods of time such as long haul flights, all night revision sessions or serious piano practice.

Friday 16 January 2015

DIY: Music Lyrics Photo Frame

Things you will need for this DIY are: An old picture frame (size of your choice), An image for the inside (it should be smaller than your frame), Acrylic paint and paint brushes(optional), Plain paper A3/A4/A5 (depending on the size of your frame), glue, Pencil for marking out and a pen of your choice (marker pen, fine liner). The reason this DIY includes a lot of optional things or things where you can choose yourself is because it will allow you to be more free and create a photo frame that will suite your room and be in your style! This might even be a good present for a friend or maybe even a Valentines gift where the central picture is of you and your loved one? It is very much down to you! So here we go…

First you will want to mark out (in pencil) on your plain paper where your frame overlaps so that your writing won’t be hidden and roughly mark out where your image will be. 


The next step will be optional. Now if your frame is not of your desired colour you can paint it. As mine is pink which doesn’t match my bedroom I’m going to paint it white instead. You can paint it however you like: in block colour, stripes, or patterns and with whatever colour you want. This is the second step so that your frame can be drying whilst you continue with the rest of the process. For my version I decided to add black splatters of paint around the frame simply by using watered down paint and flicking the paint brush, I did the same on the corners of the paper inside so that it had a more continuous effect.
TIP: If you have a dark coloured frame think carefully about your colours. I chose white for a pink frame but it took me quite a lot of layers of thick paint to cover the original pink, this is something you might want to consider.
FURTHER TIP: PLEASE be careful with your paint you may want to put newspaper or an old magazine down so that firstly you don’t get paint everywhere (like I managed to>.<) and secondly to prevent your frame sticking to your desk/ surface whilst drying (like mine did >.<).


On your plain paper that has been marked out you should start to write in, with the pen of your choice, lyrics from your favourite song(s). Obviously here it is completely optional which lyrics you choose and how you write them out.This step is optional but it is easier if you can glue your image to the paper as it will prevent it from sliding around in your frame however if you don’t have glue to hand, don’t worry just line it up as well as you can. On the other hand if you happen to have some blue tack take a small amount place it on the back of your image. Place all the pieces of your frame together and you’re done!


Your picture is now ready to be hung on the wall or wrapped as a gift! Here is my finished result. 

Let me know what you think and if you give this a go I’d love to see yours! You can tweet me @Bishhyyy , comment down below or tag me on Instagram @jazbishy . I hope this was helpful.
Jaz Bishop xxx